Just for fun. I decided to add some old art journaling pages. I hope to do more art jouranaling in 2012. It is always therapeutic for me and just down right fun. I love that there aren't any rules. It isn't like scrapbooking. If I mess up on it then I can tear it out or cover it up with paint or paper. If I hate it I don't have to show anyone. I love that I'm the only one who knows exactly what I meant by something I journaled. I can sometimes convey what I'm feeling in a single word. Which is good because sometime words escape me, but the art part steps in. It reminds me exactly how I felt at the time, inspires me to see how I feel about it now and then I share it with others and they see or relate to it in a completely different way. Yes I need to art journal more in 2012.
Supplies:
Clipboard
Red paint
Making Memories Specialty Glaze Pearl
Ranger Mixatives Silver
Foam Stamps
Christmas Stamps
Step 1 Take clip off of board if possible if not then tape it up.
Step 2 Paint clipboard.
Step 3 Stamp foam stamp images randomly with the Specialty Glaze.
Step 4 Put Mixatives on toothbrush or other brush and flick onto clipboard.
Step 5 Stamp randomly with Christmas stamps to fill in blank spaces.
Step 6 Edge the clipboard with the Specialty Glaze.
I have two versions of the altered clipboard. One was just for fun to put photos on or as decoration. The one I show in the video was left flat with no dimension on it so that it could be used as a Christmas wish list, Christmas card list or just put word searches and coloring pages on for something fun.
So this was the last day. I hope you all enjoyed the projects and found something that got your creative juices flowing.
Oh PS, to make all of these projects only cost me about $60.00. To keep the cost down I just bought the basics like the clipboard the apron. Other then that I stuck to using what I had on had. Not to bad for all the decorations I have from it.
Supplies:
Scrapbooking paper
Music paper
Paper trimmer
Distress inks
Holly sprig or berries
Holly leaf templete
Measurements: Martha Stewart Template
10" Wide
7" Tall
1" Flap to seal bag with.
1 1/2" Side panel scored halfway
3" Front panel
1 1/2" Side panel scored halfway
3" Back panel
Step 1 Cut and score scrapbooking paper for bag.
Step 2 Tape together.
Step 3 Diecut music paper and ink edges.
Step 4 krinkle flower edges and glue together.
Step 5 Glue holly berry in center and hold flower around it.
Step 6 Trace and cut out holly leaves.
Step 7 Fold leaves in half then ink edges.
Step 8 Glue leaves and flower together.
Step 9 Glue Holly to front of bag.
Step 10 Add a gift tag.
I really liked the idea of using the paperclip as the closer. I glued the Holly to the longest end and then when I pushed it all the way down the Holly was still in the middle. Last day tomorrow. This has been a lot of work and I am ready for a break. lol
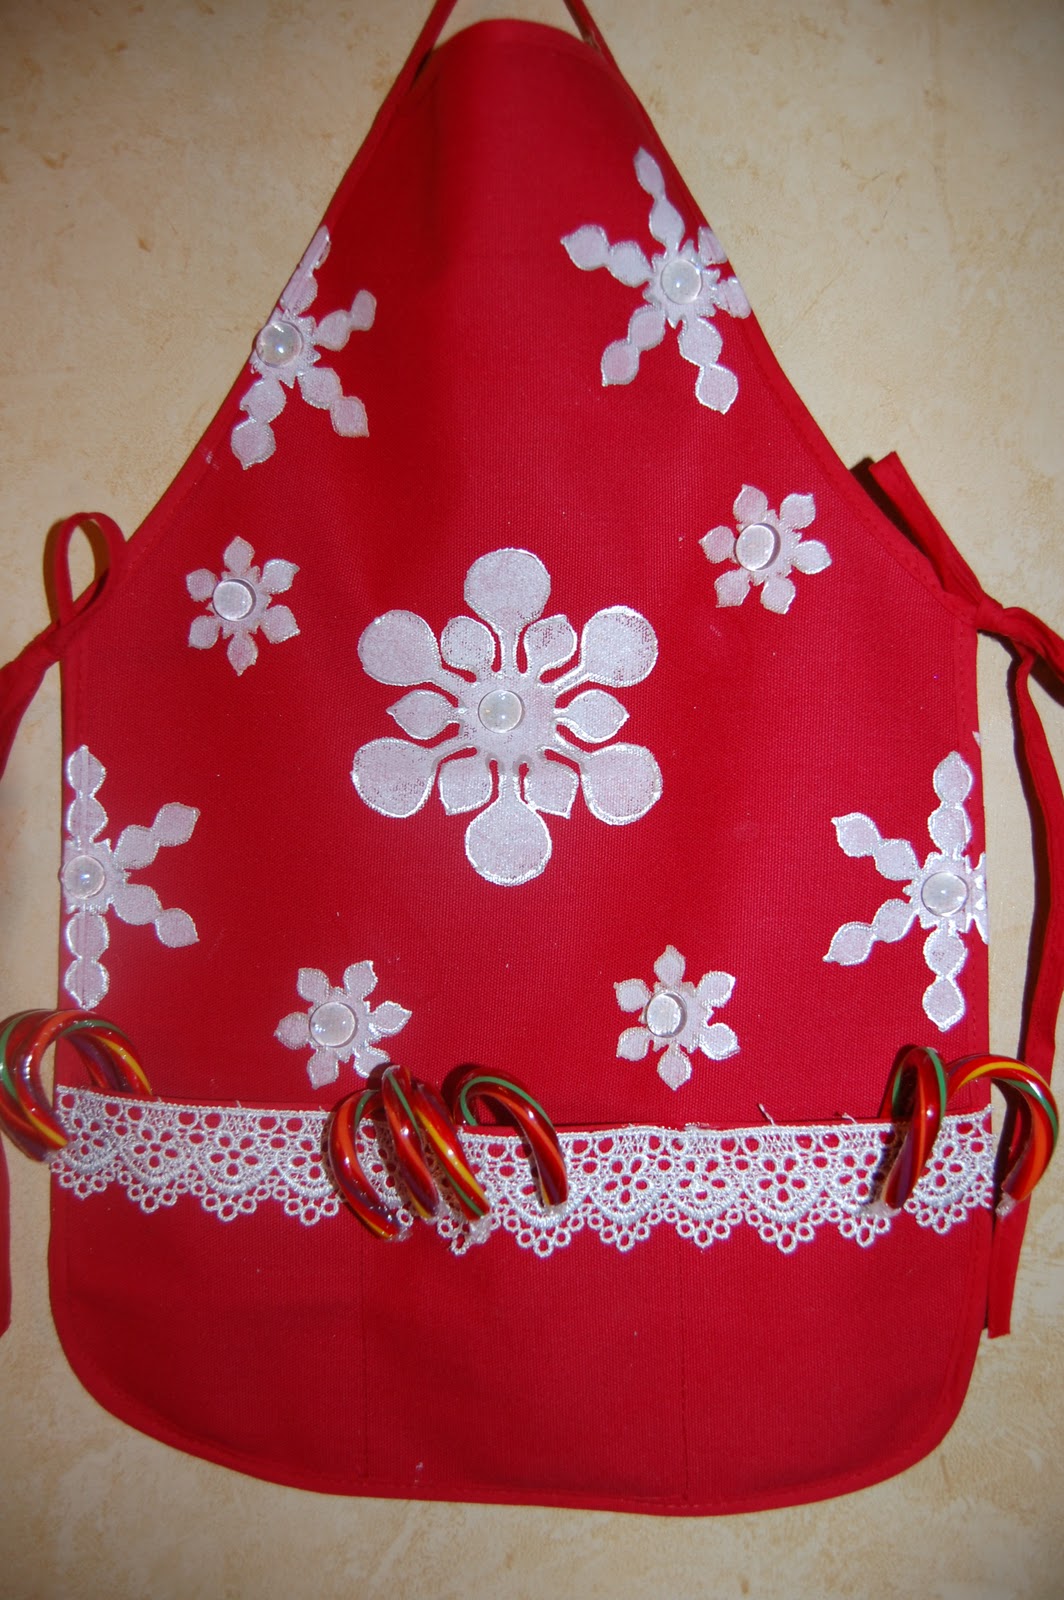
Supplies:
Kids Canvas apron.
Scribbles 3D paint
Lace
Stencil of snowflakes
Glass pebbles
Opal Liquid Pearls
Step 1 Iron apron flat.
Step 2 Use foam brush and lightly stencil snowflakes on to apron in random pattern.
Step 3 Outline the snowflakes with Liquid Pearls.
Step 4 Hot glue lace onto top of pockets.
Step 5 Tie side strings into bows.
I have a couple ideas of how to use this pictured below, but I think it could also work as a message center with a note pad and pens. Another idea if your pockets are wide enough would be for all the Christmas cards you receive. I would love to know what you think.
Supplies:
Foam wreath
Muslin cut into equal strips
Lace
Dew drops
Holly berry sprig
Pine Needles Distress Ink or Glimmer mists
Step 1 Wrap fabric all the way around wreath. Make sure none of the foam shows through.
Step 2 Add ink or mists to edges of wreath.
Step 3 Hot glue lace trim around wreath.
Step 4 Hot glue dew drops around center.
Simple and inexpensive project. Be careful with your foam so that you don't crack it while wrapping the fabric. Below are a couple different display ideas. It might also work as a picture frame.
Supplies:
Metal star cookie cutters
Jingle bells
Wire
E6000 glue
Step 1 Drill a small hole in center of one of the star points.
Step 2 Twist top of wire into a spiral then run through hole do the same for other end and place bell on wire.
Step 3 Layout the stars to form a layout or pattern you like.
Step 4 Glue together with E6000 on edges that touch.
Step 5 Run cording or wire through top center star to make a hanger.
Tips: My cookie cutters had a stupid label on them. I didn't think about it but if you can soak the labels to get them off you will have a cleaner looking finished product. Let the E6000 dry over night to ensure that it is adhered well.
Supplies:
Picture frame
Scrapbooking paper
Cardboard tree (Dollar bin album Michael's)
Leaf sprig (Dollar bins at Michael's)
Snowflake garland (Christmas area of Michael's)
Snowflake buttons (Christmas area of Michael's)
Distress ink (Black Soot)
Step 1 Take frame apart and measure for scrapbooking paper.
Step 2 Cut out the paper.
Step 3 Put the frame back together with the paper on top of the glass.
Step 4 Glue snowflake garland around edge of frame.
Step 5 Paint cardboard tree green. I also cut off the trunk.
Step 6 Cut individual leaves off of sprig.
Step 7 Glue leaves to tree.
Step 8 Trim leaves around the edge of tree and ink to add depth.
Step 9 Glue tree to center of frame.
Step 10 Glue buttons around tree.
This frame could have anything in the center. An trees made from buttons, a holiday sentiment, small stocking anything really. I know black isn't a traditional Christmas color, but I really like the way it looks.
Supplies:
Scrapbooking paper or scraps
Cording or yarn
Distress ink
Stickles or Glitter glue
Sizzix #2 Stars Die
Step 1 Cut cording to desired length.
Step 2 Diecut stars out of the scrapbooking paper. Make sure to diecut with pattern facing up and pattern facing down.
Step 3 Line stars up in a pattern. Mine went small, medium, large, medium, small, medium, large.
Step 4 Use Distress ink on the edges.
Step 5 Sandwich the cording between two stars.
Step 6 Use Stickles or Gitter glue on one side of the stars.
Simple project for today. You could use the garland to decorate anything. I used it over a door and just laid it on a table.
Supplies:
Popsicle Sticks
Green Paint
Gesso
Book Paper
Buttons
Ribbon
Holiday Stamp
Step 1 Get ready to glue 3 popsicle sticks into a triangle shape.
Step 2 Punch hole for ribbon hanger.
Step 3 Cut down additional popsicle sticks to the correct sizes to form a tree.
Step 4 Glue all the popsicle stick together.
Step 5 Paint tree green.
Step 6 Cover with gesso. (Don't forget to dab paint and gesso off some.)
Step 7 Glue torn book paper randomly on tree.
Step 8 Glue on buttons.
Step 9 Add Snow Writer fake snow.
Step 10 Stamp with Holiday sentiment.
Step 11 String ribbon through hole and glue bow at the top.
Supplies:
Plastic ball ornaments
White Satin Ribbon
Strung Pearls
Diamond Dust
Glossy Accents
Snowflake Buttons
Hot Glue
Step 1 Add Glossy Accents into the center of the ornament.
Step 2 Add Diamond Dust and mix into the Glossy Accents.
Step 3 Add ribbon and pearls inside ornament.
Step 4 Glue buttons to outside or ornament.
Step 5 Add ribbon and pearls to outside.
Supplies:
Book paper
Paper trimmer
Something to score with
Pine Needles Distress Ink
Gold embossing powder
Pearls
Step 1: Score book paper at 1/2" increments all the way down the page. Cut paper down by about 1/2" for each new tier. Large tiers will require multiple book pages to form a circle.
Step 2: Fold on pleats to make accordion.
Step 3: Glue pleats as needed to form circle.
Step 4: Hot glue rosette to punched or cut circle
Step 5: Ink edges with green ink.
Step 6: Punch star shape.
Step 7: Emboss star with embossing powder.
Step 8: Glue tiers together larges to smallest to form tree.
Step 9: Glue star on top.
Step 10: Glue pearls randomly around each tier.
This project wasn't difficult but it was time consuming. I sat in front of the TV making the rosettes. So day one is down and I'm hoping the videos go a little faster next time. I always seem to run into some kind of problem making them. Anyway, I would love to know what you think.
I had this fun idea to do one craft a day for the first ten days of December. I have been a busy bee since Thanksgiving trying to get ready for it. I will post a video everyday but in order to make the process go a little faster I'm not going to record from start to finish. I will just record the important parts and then post any additional information here along with the finished products. So here we go.
This is my latest project. Had loads of fun with all the Halloween products. I think I'm ready to move on to some layouts though. I need to get caught up on some of the photos that I have been taking. I say that and then I will end up getting an idea for a mini and want to do that more.lol
I thought I would add some of the more recent projects I have done to the new blog. It looked so bare. lol So forgive me if you have already seen these videos.
I'm so upset I could cry. I accidentally deleted the google account that my blog was attached to. I apperantly had two google accounts. One I used when I started my blog and one from starting youtube. Anyway, I never even realized this until a couple days ago when if I logged into blogger it would log me out of youtube and vis versa. I decided I would just delete one of the accounts, but didn't realize it was the account my blog was attached to. I have tried to retreive it and haven't been able to. Just FYI on this by the way Google was no help at all. They didn't even respond to my message to see if there was something I could do. So here I am starting over after four years of blogging all my thoughts and crafts projects gone. It almost felt like loosing one of my scrapbooks. I was fortunate in that I was able to only change my new blog by only one letter. Hopefully, this will allow people to still find me. So now it went from Pick A Dilly Craft to Pick A Dilly Crafts. If you found me and were subscribed to my blog previously then please subscribe again and if you had me linked on your blog then please update your link. I absolutely appreciate each of you who follow and read my random crafting rambles.